On weekdays at breakfast-time, my daughters almost always ask for toasted bagels with cream cheese.
The early morning shuffle to school and work ranks among my least favorite hours of the day, and thankfully, this toast-spread-and serve repast helps ease me into it. It provides a predictable element to the bleary-eyed chaos and minimizes the likelihood that I’ll completely lose it before 8:00 am and then feel like a crappy mom for the rest of the day. In the interest of keeping our mornings moving along smoothly, my kitchen’s always stocked with at least one bag of mini bagels from the grocery store.
On most mornings, Tessa eats half of her bagel and asks, “Can I please be done?” Last week, I told her yes, picked up the remaining half of her breakfast, and took a bite. The bland flavor and dry texture tasted decidedly uninspiring. This uninspiring bite did spark inspiration, though: I got right to work on improving the quality of the bagels busting out of our toaster.
If I didn’t live on an island, I probably would have simply added a weekly bagel shop stop to my list of errands. Instead, I consulted cookbooks and compared bagel recipes. I found potato-based recipes, whole grain recipes, recipes with starters, recipes that relied on steaming rather than boiling, and recipes that suggested shaping bagels from strips of dough rather than the more traditional “just poke a hole in the center with your finger” method.
I settled on a recipe from The King Arthur Flour Baker’s Companion as a starting place. The recipe looked straightforward, and the off-putting, obscure-sounding ingredients like non-diastatic malt powder came paired with recognizable alternatives, like brown sugar.
As I prepared to make my first batch, I felt surprised that I hadn’t made homemade bagels before. The dough looked no more difficult to make than any standard bread recipe, and the idea of boiling dough before baking it–which had always intimidated me before–didn’t seem complicated at all. Perhaps my recent adventures dropping doughnuts in seething oil made slipping rounds of dough into simmering water look easy.
My anticipations of simplicity proved correct. The recipe was so simple, in fact, that when Tessa declared that she didn’t like bagels with sesame seeds, I made her some plain ones the very next day.
This wasn’t a completely selfless endeavor; our freshly baked bagel supply was dwindling, and I wanted to eat at least one more bagel myself. I had my heart set on a bagel sandwich for lunch the next day — chock full of leftover steak layered with red onions, Swiss cheese, and mustard. But impending breakfast bagels and lunchbox peanut butter and jelly bagels stacked the odds against my bagel sandwich becoming a reality.
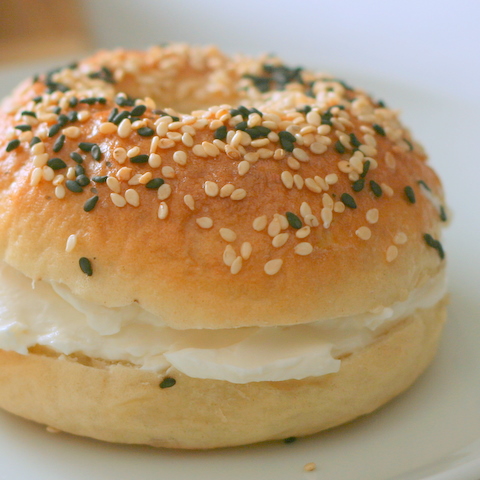
I started making dough after dinner, and, by 9:30 pm, pulled 12 unadorned, golden beauties from the oven. This happened long before I started getting tired or annoyed with myself for embarking on a baking project in the evening. Instead, I decided I had room for a warm bagel. I ate it plain and savored the soft-dense, chewy interior inside its thin, crisp crust.
And my sandwich for lunch the next day? Just as good as I imagined.
This morning when Tessa said, “”Can I please be done?” I excused her from the table. When I took a bite of her remaining breakfast, the satisfying crunch of toasted bagel combined with smooth, creamy cheese prompted me take another bite. And then another. Before I knew it, I finished the rest of her bagel. I’d already had my own breakfast. This could be dangerous.
Bagels
Adapted from The King Arthur Flour Baker’s Companion. Makes one dozen 3-inch bagels.
Dough
1 1/2 cups lukewarm water
1 tablespoon active dry yeast
4 cups unbleached all-purpose or bread flour
2 teaspoons salt
1 tablespoon brown sugar
Water Bath
2 quarts water
2 tablespoons brown sugar
1 tablespoon granulated sugar
Add water to the bowl of a standing electric mixer, sprinkle yeast and a pinch of brown sugar over its surface, and stir to combine. Let sit for 10 minutes until it begins to bubble.
Add one cup of flour, the salt, and brown sugar to the yeast mixture and stir with the paddle attachment until well-combined, 1 to 2 minutes. Add remaining flour, 1/2 cup at a time, to form a thick dough that clears the sides of the bowl. Change to the dough hook and knead for about 3 to 5 minutes. If desired, transfer dough to a lightly floured surface and knead briefly by hand. The dough should feel stiff but springy to the touch.
Place the dough in a lightly greased bowl and set it aside to rise until about doubled in bulk, 1 to 1 1/2 hours.
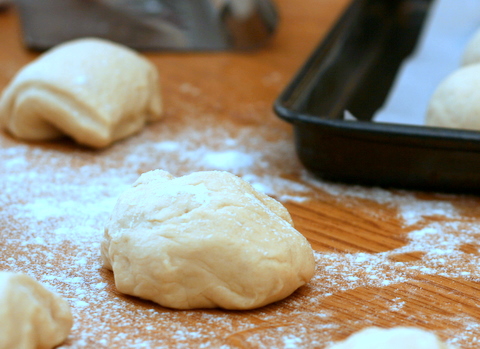
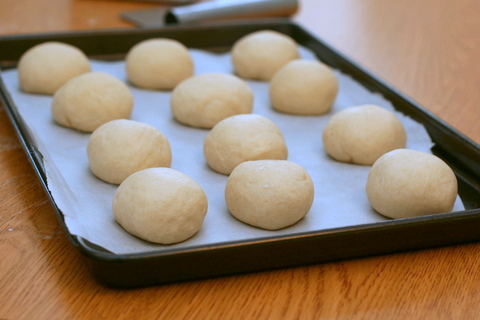
Transfer the dough to a work surface and divide it into 12 equal pieces. Working with one piece at a time, shape into tight, round balls, pinching and smoothing the seams on what will be the bottom side of each bagel. Cover the balls with plastic wrap and let them rest for 30 minutes. They’ll puff up slightly.
While the dough rests, prepare the water bath by heating the water and sugars to a gentle boil in a large, wide-diameter pan. Preheat oven to 425°F.
Use your index finger to poke a hole through the center of each ball, then twirl the dough on your finger to stretch the hole till it’s about 1 inch in diameter. Place each bagel on a lightly greased or parchment-lined baking sheet. Repeat with the remaining pieces of dough.
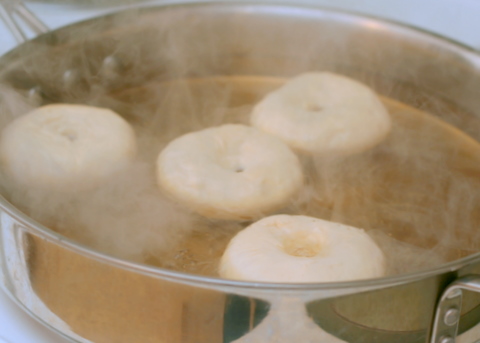
Transfer the bagels, four at a time, to the simmering water. Increase the heat under the pan to bring the water back up to a gently simmering boil, if necessary. Cook the bagels for 2 minutes, flip them over, and cook for 1 minute more. Using a skimmer or strainer, remove the bagels from the water and place them back on the baking sheet. Repeat with the remaining bagels.
Bake the bagels in the lower half of your oven for 20 to 25 minutes or until they’re as deep brown as you like. If they brown too quickly, place a baking sheet on the top rack to diffuse the heat. When finished, remove the bagels from the oven and cool completely on a wire rack.
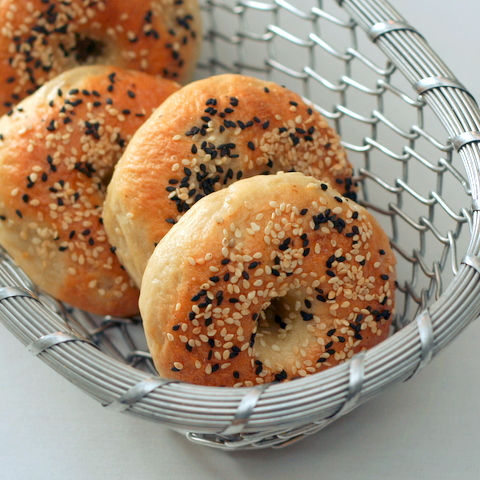
For seeded bagels: Just before baking, brush each bagel with a glaze made of 1 egg white beaten till frothy with 1 tablespoon of water. Sprinkle heavily with seeds.
Some of the links in this post are affiliate links. If you click through and make a purchase, I earn a small commission for my referral at no additional cost to you. Thank you for supporting Flour Arrangements.


I will be making these tomorrow!! Yum.
A few magically appeared in my kitchen and they were scrumptious!! I had two for dinner. What a treat!
I’m kinda surprised I’ve never made bagels either. Thanks for making it look so easy!
I tried your bagel recipe and they were fantastic! And just as easy as you’d said. Thanks for posting the recipe – I found it on the baking SubReddit.
Hey lovely!
You are posting so many delicious things, I use your blog instead of my cook books! Do you think a search feature is in your future? Off to make bagels a second time!
Scroll down for the search box; it’s right above the archives in the right column. Happy bagel making!
Just made these this afternoon and they turned out great! P and G and their friends all ate one with cream cheese and jam! Thank you for doing such a great job detailing the steps! They were fun to make and even better to eat!
So great to hear from you, Joan! We miss having you here on the island. Glad to hear the bagels were a hit!
Ok, I started reading this and instantaneously wanted to make bagels… then I read your closing comments and realised that if I did so, I would have trouble keeping my belt size the same. Perhaps trying the recipe once wouldn’t hurt…
I’ve commented on 2 posts now… off to subscribe.
Thanks so much for the recipe and detailed instructions! I can’t stop making these bagels! Four days in a row and I can’t keep them long enough to cool off. My family likes them tpped with asiago, parmesan, and cheddar. Yum!
Hooray! So glad they’re a hit at your house! Love the idea of adding cheese.