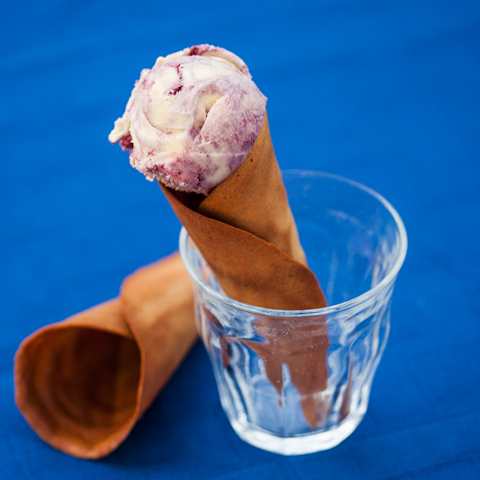
School’s started, and the days are getting shorter, true, but I’m not ready to let go of summer yet.
Fall officially arrived this weekend, but I’m still enjoying the sunshine and spending as much time outside as I can. And since I can’t walk by blackberry brambles without wanting to pick every fat, juicy berry I see, I’ve taken to carrying empty yogurt containers with me whenever I leave the house. The berries, they beckon, and I can’t resist.
While the sun is still allowing me to pretend that summer hasn’t left the Pacific Northwest, Blackberry Swirl Ice Cream has become my favorite use for fresh berries. The ice cream — sweet vanilla with a tantalizing deep-magenta ribbon — tastes like blackberry pie a la mode in frozen form.
To truly enjoy this ice cream, though, I recommend scooping it into homemade Gingersnap Ice Cream Cones.
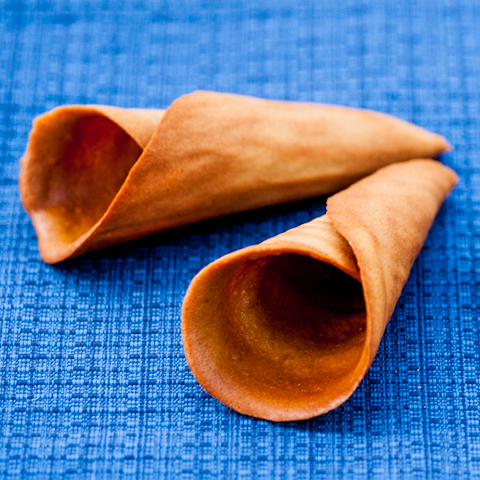
The crisp texture and warm, spicy flavor of these gingersnap cones adds a whole new dimension to the sweet and tangy flavors mingling in the ice cream.
And, as if discovering an amazing new flavor combination wasn’t enough, this project also taught me that making homemade ice cream cones perfectly complements the making of homemade ice cream. Ice cream usually requires egg yolks, but no whites.
Whenever we make ice cream, I save the egg whites thinking I’ll use them later. What really happens is this: I discover them in the back of the fridge weeks later, chastise myself for being wasteful, and then dump them warily down the kitchen drain.
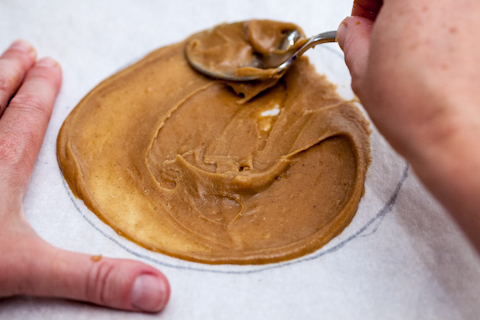
Ice cream cones have rescued me from this sad ritual; the flat, round cookies used to make cones include egg whites. Now that I know this, it seems almost crazy not to make ice cream cones to go along with freshly churned ice cream.
Making cones involves wrapping the oven-hot cookies around a conical shape; this is relatively simple to master after a bit of practice and, to be honest, a few burned fingertips.
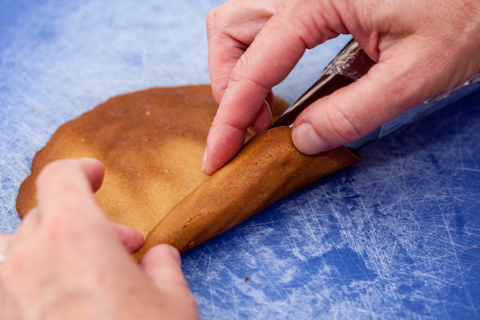
At first I tried wrapping the cookies around a cone-shaped form from a skein of yarn, but since it wasn’t pointy on the tip, it made sealing the ends difficult (and you definitely want the ends sealed to prevent the ice cream from dripping out the bottom!).
I popped a cream horn mold on the top of the form, and this did the trick.
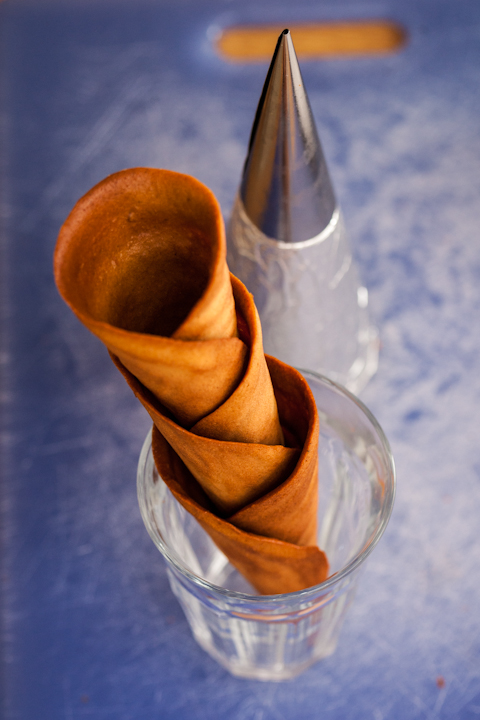
Of course manufacturers sell waffle cone makers and cone forms, but you don’t need to spend a lot of money on special equipment to make your own ice cream cones. I’ve made them three times already with my cobbled-together form, so I should know.
And now, if you’ll excuse me, the sun’s shining and the berries are calling. If I keep making ice cream, maybe summer will stick around for a while yet.
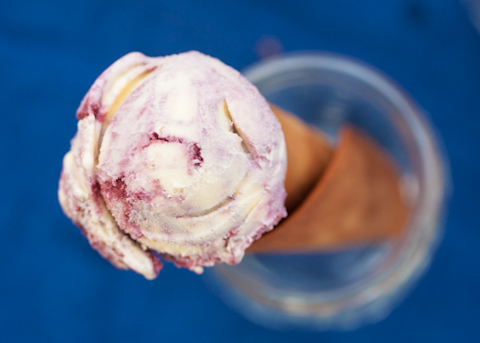
Blackberry Swirl Ice Cream
Adapted from The Perfect Scoop. Makes about 1 1/2 quarts.
Ice Cream Base
1 1/2 cups heavy cream
1 cup whole milk
2/3 cup sugar
pinch of salt
4 large egg yolks
1/2 teaspoon vanilla extract
Blackberry Swirl
1 1/4 cups blackberries, mashed and strained
3 tablespoons sugar
1 teaspoon fresh lemon juice
1 tablespoon vodka
Pour the cream in a large bowl and set a mesh strainer on top. Set aside.
In a separate medium bowl, whisk together the egg yolks. Set aside.
Warm the milk, sugar, and salt in a medium saucepan. Slowly pour the warm milk into the egg yolks, whisking constantly, and then scrape the warmed egg yolks back into the saucepan.
Stir the mixture constantly over medium heat with a spatula, scraping the bottom as you stir, until the mixture thickens and coats the spatula. Pour the mixture through the strainer into the cream and stir. Add the vanilla and stir until cool over an ice bath. Chill for several hours in the refrigerator.
To prepare the swirl, mix the strained blackberry juice with sugar, lemon juice, and vodka. Chill until ready to use.
Freeze ice cream base in your ice cream maker according to manufacturer’s instructions. As you remove it from the machine, layer it in the container with spoonfuls of the chilled blackberry mixture (if you pour the blackberry mixture into the churn while it’s still mixing, as I did one time, you will end up blackberry ice cream. Not saying this is a bad thing, but you won’t have vanilla ice cream with a berry swirl if you do it this way).
Gingersnap Ice Cream Cones
Adapted from The Perfect Scoop. Makes 16 cones.
1/2 cup egg whites (about 4 large egg whites)
1 cup sugar
2 tablespoons molasses
1/4 teaspoon salt
1/2 teaspoon ground cinnamon
1/2 teaspoon ground ginger
1/4 teaspoon ground cloves
1 1/3 cups flour
4 tablespoons unsalted butter, melted
Preheat the oven to 350 F.
Combine the egg whites, sugar, and molasses in a small bowl. Stir in the salt, spices, and half of the flour. Mix in the melted butter, and then stir in the rest of the flour until smooth.
Draw two 6-inch diameter circles on a piece of parchment paper. Turn the paper pencil-side down on a baking sheet. Use the back of a spoon or a small spatula to spread 2 level tablespoons of batter inside each circle, doing your best to make your circles smooth and even.
Bake one sheet (2 cones) at a time, until the cookies are golden brown (some light spots are okay), about 10 to 15 minutes.
Pull the sheet out of the oven and run a thin metal spatula under a circle to loosen the edges. Transfer one cookie to a flat surface and quickly roll it around the cone shaped mold. Press the seam firmly against the counter or cutting board to close the sides of the cone, and then pinch the bottom together to seal the point at the bottom. Let the cone cool slightly on the mold until it keeps its shape, and then let it cool completely in a tall glass. Repeat with the second cookie (if the cookie has cooled too much to roll, return the sheet to the oven for a minute).
Continue to bake and roll cones with the remaining batter.
Some of the links in this post are affiliate links. If you click through and make a purchase, I earn a small commission for my referral at no additional cost to you. Thank you for supporting Flour Arrangements.



You rock! Have I told you lately that YOU ARE AMAZING!!
I second that. YOU. ARE. AMAZING. Love this. If I bring you some berries…
Wow!!!
Hi, love this idea. It looks delish… if you find that you have some cones with open bottoms, dip them in melted chocolate and let them solidify. You can also decorate them a bit more if you want by dipping the melted chocolate in crushed nuts, sprinkkles, etc.. You won’t get any ice cream dripping out the bottom & a bonus tasty treat at the end too!
Kim, dipping cones in chocolate and decorating them sounds adorable and delicious — thanks for the idea!
Really nice site, actually makes me want to cook.
We are not alcohol users so my question is what function does the vodka have in this recipe ? Does it need to be replaced or may it simply be omitted without upsetting the chemistry of the recipe. Thank you.
The alcohol helps prevent the swirl from getting icy, but you could absolutely omit it. Hope this helps!