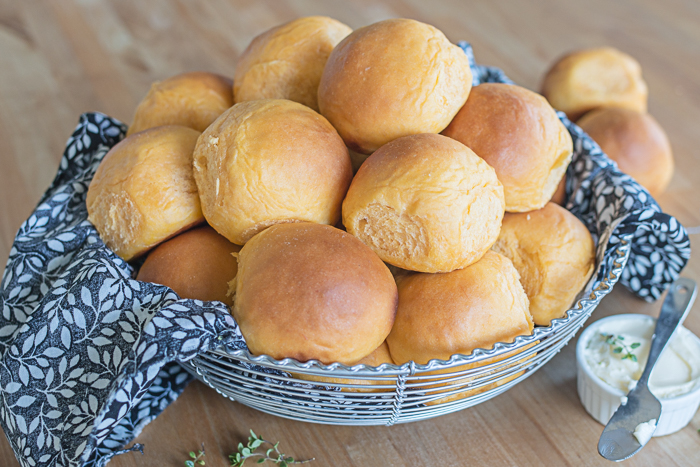
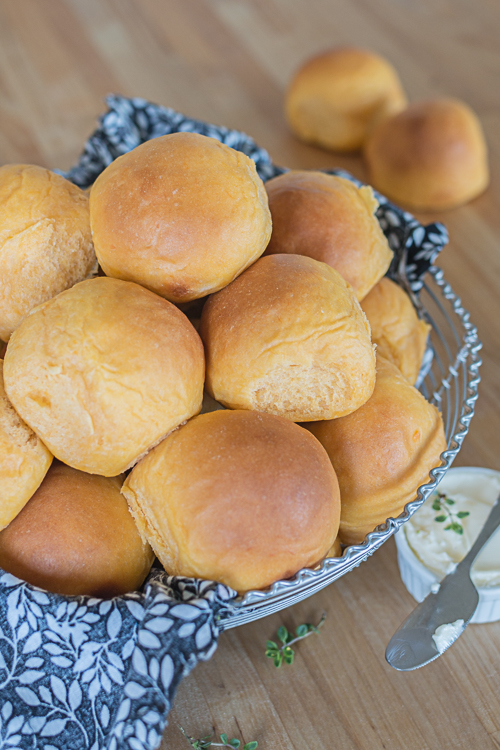
Tender and light, these melt-in-your mouth Sweet Potato Rolls deliver a rich, buttery experience with a distinctive sweet potato flavor.
During our time on San Juan Island, we lived in a super-tiny house, but that didn’t stop us from hosting large parties with great regularity. Fourth of July? Come on over, friends! Birthday? Let’s celebrate. Random Saturday with nothing to do? Time for another party!
The expansive outdoor space where we lived at Friday Harbor Labs provided a perfect gathering spot. Friends would socialize on the grass or at the beach while kids raced though the trees or climbed on the play structure near our cottage.
To feed our guests, my husband usually smoked plenty of pork shoulder, and I’d make Sweet Potato Rolls to go with it. His pulled pork tastes truly amazing, especially in the form of pulled pork sliders on tender, light Sweet Potato Rolls.
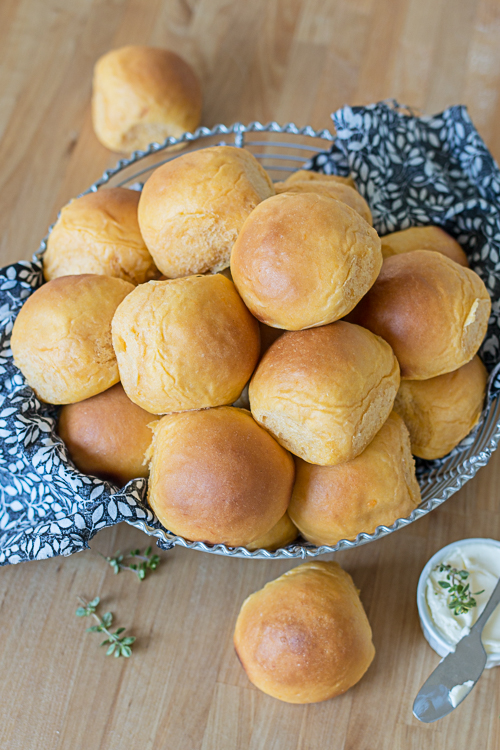
Soft and fluffy, with a lovely orange hue and distinctive sweet potato flavor, these rolls look as beautiful as they taste. They’ve long been a favorite of family and friends.
I shared the recipe years ago (it’s actually the the second post I ever wrote!), but it’s long overdue for an update.
 The sheer quantity of rolls the original recipe produces makes it ideal for a huge crowd, but the recipe is just too much for everyday baking.
This new, scaled-down recipe produces two dozen rolls rather than five. Let’s face it, even with two dozen, you could still have friends over for dinner with rolls to spare.
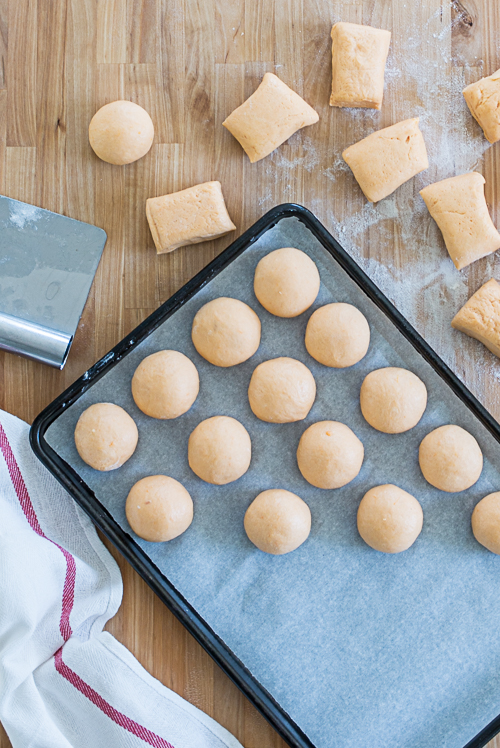
In addition to scaling down the recipe, I’ve updated the directions for shaping the rolls. The original directions call for rolling out the dough, cutting it into rounds with a cookie cutter, and folding each round in half before baking.
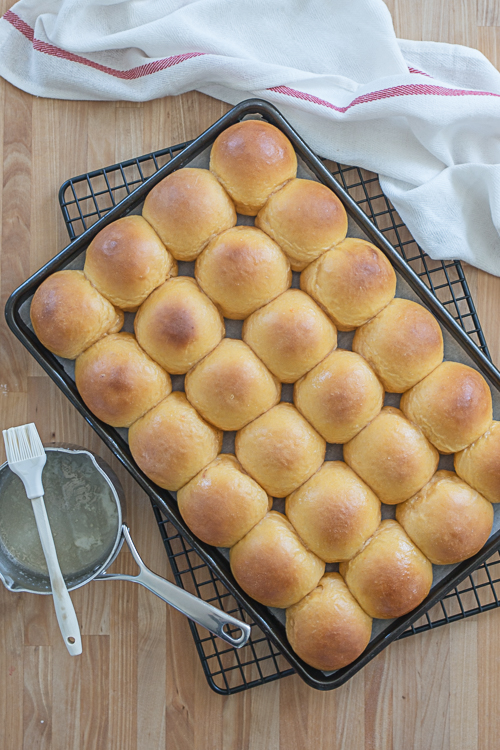 At some point I stopped using a cookie cutter and started dividing the dough with a bench scraper before rolling it by hand into tight balls. Spaced closely on a rimmed baking sheet, the rolls crowd into each other during rising and baking. The sides of these pull-apart rolls take on a delicate airy texture while the tops grow smooth and golden.
Refrigerating this slack, sticky dough overnight makes it much easier to divide and shape. Working with cold dough means you can use less flour while forming the rolls, and this helps keep them pillowy-light and moist. Overnight chilling requires some advance planning, but it’s well worth it.
 I love that these Sweet Potato Rolls come together in small steps. While the entire process takes quite some time, the active time feels minimal since it’s stretched out over different stages.
As they bake, these rolls fill the house with an intoxicating toasty-sweet aroma. My kids somehow always arrive in the kitchen to swipe Sweet Potato Rolls just as I set them on the counter to cool. I can hardly blame my girls since these fluffy, tender rolls taste best oven-warm.
These melt-in-your mouth rolls deliver incredible flavor that’s delicious on its own and heavenly layered with pulled pork and coleslaw.
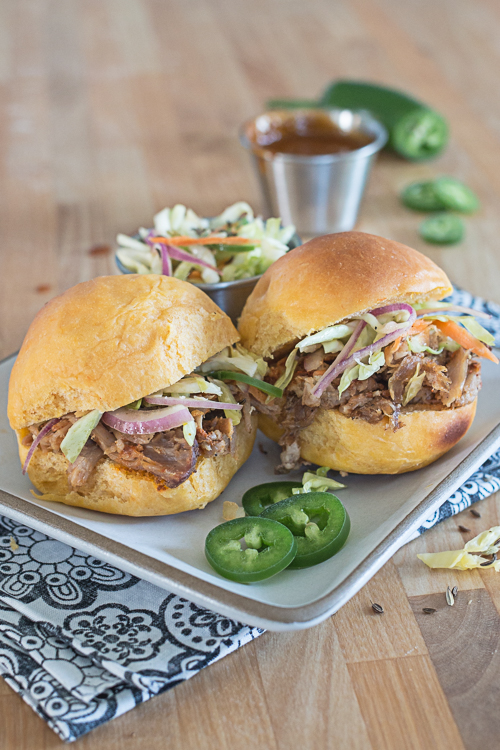
Light and Tender Sweet Potato Rolls
Ingredients
- 1/4 cup warm water (105-115°F)
- 2 1/4 teaspoons active dry yeast
- 1/4 cup + 2 tablespoons granulated sugar
- 8 tablespoons unsalted butter divided
- 1/2 cup milk
- 1 teaspoon kosher salt
- 1 cup mashed sweet potato (from one large or two small baked sweet potatoes)
- 1 large egg
- 4 cups unbleached all-purpose flour plus more for shaping, as needed
Instructions
- Measure warm water into a glass measuring cup with a pour spout. Sprinkle the yeast and a pinch of the sugar over the water's surface. Stir to dissolve the yeast and set aside.
- Melt 6 tablespoons of the butter in a small sauce pan over low heat. Add milk, sugar, and salt. Stir over low heat until the sugar dissolves. Remove from heat and set aside.
- With the paddle attachment, beat the sweet potato and egg in the bowl of a standing electric mixer. Beat in the milk mixture and then add the activated yeast (it should be bubbly). Mix to combine.
- Add 2 cups of the flour and mix well. Add the remaining flour, about 1/4 cup at a time, allowing it to incorporate before adding more. The dough will be quite sticky.
- Switch to the dough hook and knead until the soft dough looks smooth, about 5 to 7 minutes.
- Scrape the soft, tacky dough into a greased bowl, flipping it once to coat the dough with oil. Cover the bowl with plastic wrap and let the dough rise in the refrigerator overnight. It should double in size.
- Grease or parchment-line a rimmed baking sheet (I used a 10 by 15-inch pan). Turn the cold dough out on a lightly-floured surface and divide it into 24 evenly-sized pieces.
- Using just enough flour to prevent sticking, roll each piece into a tight ball and place it on the prepared baking sheet, spacing the rolls closely together.
- Cover the rolls with lightly oiled plastic wrap and let them rise at room temperature for 1 to 1 1/2 hours.
- In the meantime, preheat oven to 375°F.
- Bake the risen rolls for 15 to 20 minutes, until golden brown and gently firm to the touch.
- While the rolls bake, melt the remaining 2 tablespoons butter. Brush oven-warm rolls with the melted butter.
Some of the links in this post are affiliate links. If you click through and make a purchase, I earn a small commission for my referral at no additional cost to you. Thank you for supporting Flour Arrangements.



Leave a Reply