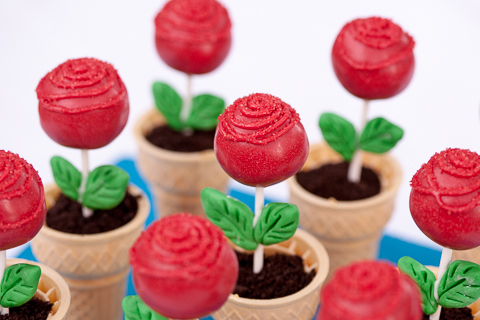
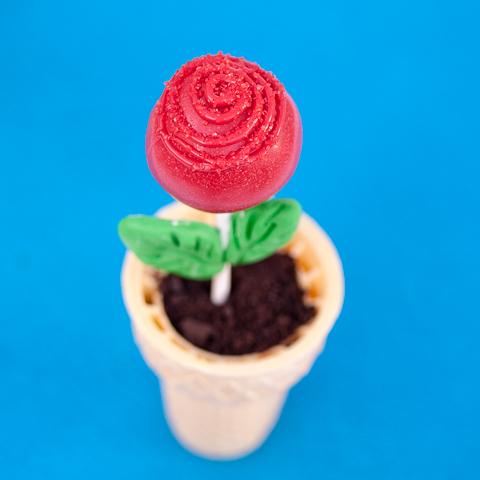
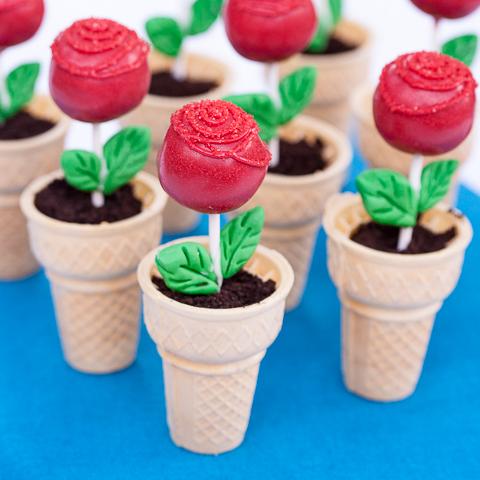
Ice cream cones make perfect edible flower pots for Rose Cake Pops. A dusting of chocolate cookie crumbs over ice cream looks just like dirt.
My daughter Tessa has been asking me to make cake pops for about a year. I’m usually game to experiment in the kitchen, but whenever she brought up the subject of cake pops, I always found some excuse to put her off.
For some reason, the idea of baking a cake just to crumble it up and wad it into balls seemed strange and unappealing to me. The other thing that got me was this: every time I looked up instructions for making cake pops, I read that I should bake a boxed cake mix and open a can of prepared frosting.
I love to bake from scratch, so these first steps always deterred me. I see now that my objections are pretty lame: nothing was stopping me from substituting whatever cake and frosting that I wanted.
As her birthday approached, Tessa started talking about cake pops with increased frequency. Birthdays are a big deal at our house, and my kids know that I’ll do my best to create whatever special treat they want for their parties.
Surely she knew what she was about — I couldn’t very well come up with an excuse not to make cake pops for her birthday.
Since she’d been thinking about cake pops for so long, she couldn’t settle on what she wanted them to look like; rubber duckies, owls, tea cups, and penguins were all leading contenders. As I did more research about how to make them, I stumbled across a simple rose cake pop somewhere on the internet.
Tessa’s middle name is Rose, and she loves anything involving this flower. With a bit of enthusiasm on my part, she decided that she wanted roses for her party.
Creating cake pops isn’t hard, but it does involve quite a few steps. Rather than use a box mix as directed, I baked an easy, yet amazing chocolate cake recipe that I make whenever I want chocolate cake without much hassle.
Instead of using canned frosting, I made a simple sour cream chocolate frosting. Other than that, I followed the directions in Bakerella’s Cake Pop Kit, which are thorough and user-friendly. Here’s a summary of the process:
- Bake a cake
- Break it into small crumbs
- Mix frosting with cake crumbs
- Roll cake-frosting mixture into small balls
- Refrigerate cake balls for several hours
- Working one at a time, dip sticks in melted candy coating and insert into cake balls
- Dip cake-topped sticks in candy coating
- Place dipped pops upright in a stable base
Bakerella’s directions go into greater detail, of course. If you decide to make cake pops, you’ll want to refer to one of her books or any of the countless internet tutorials put together by one of the many amazing cake pop experts out there.
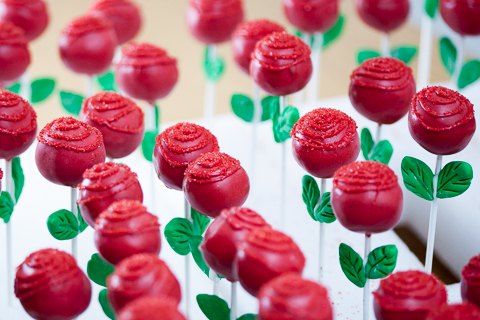
Once I managed to finish dipping Tessa’s cake pops in candy coating, I transferred the remaining coating into a piping bag fitted with a small round tip. After letting it cool slightly, I piped spirals around the top of each pop and then dusted them with red sprinkles.
My pops certainly weren’t uniform or perfect, but they looked much better than I ever imagined they would. When gathered together in a large group, they actually looked pretty good.
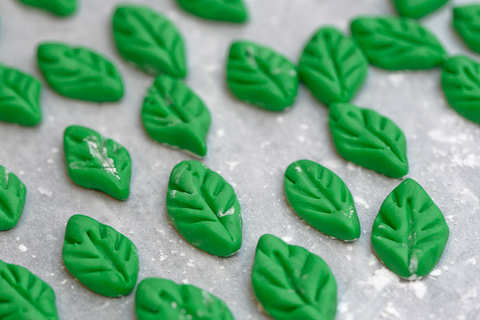
I had some marshmallow fondant on hand, which I colored green and formed into small leaves. I melted white candy coating and used a toothpick to apply a small amount to each leaf before attaching it to a stem.
Attaching spearmint candy leaves in the same fashion or tying a bit of green ribbon around the stem would provide a similar effect if fondant seems like too much trouble.
I had imagined planting the rose pops in tiny terracotta pots filled with ice cream and chocolate cookie crumbs. Before I got around to ordering actual pots, I realized that ice cream cones could serve as edible flower pots.
Not only did this sound more appetizing, it meant that I wouldn’t have to figure out what to do with all those flower pots after the party ended.
The day before the party, I thawed ice cream a bit to make it easier to scoop into the cones. Once the cones were filled, I popped them back into the freezer to harden.
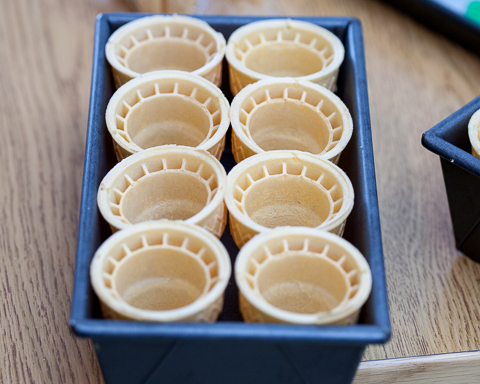
Since the filled cones get a bit tippy, I used loaf pans to keep them upright.
The day of the party, I added a rose pop and cookie crumb topsoil to each cone right before we planned to serve dessert. This proved challenging: adding top-heavy cake pops to the prepared cones made them even more unstable than before.
Also, the cones got a bit soggy sitting in the freezer overnight. If I ever made these again, I would assemble them on the fly and place finished flower pots directly into the hands of my party guests.
After the party, I experimented with skewering the pop sticks through the bottom of the ice cream cones into a piece of Styrofoam. This stabilized these edible flower pots perfectly.
Because of the hole, filling the cones with jelly beans or chocolate chips instead of ice cream and cookie crumbs might work out better.
At some point during Tessa’s birthday-treat indecision, she had talked about wanting a cake shaped like a teapot. Since I wasn’t sure that the cake pops would turn out all right, I baked spherical cake that I could turn into teapot if I got desperate.
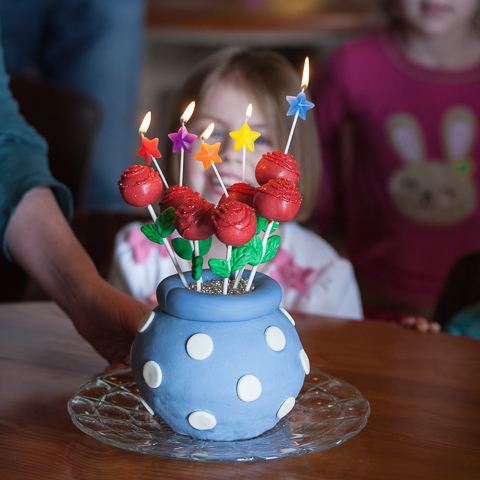
When I realized that I was going to pull off the rose cake pops, I decided to leave the teapot project for another day. Rather than turn that six-inch ball of cake into a giant cake pop as requested by Tessa, I wrapped it in fondant and turned it into a vase.
As we struggled to keep the tiny flower pots upright, I felt relieved that we had something more stable than wobbly flower pots to hold the birthday candles.
Now that I’ve made cake pops, I have to admit that reducing cake to crumbs with my bare hands is strangely satisfying.
This turns out to be a good thing since my kids have mapped out about two years’ worth of cake pop projects already. Unicorns and puppy dogs and dolphins and clowns, here we come.
Simple Chocolate Cake
Adapted from The Foster’s Market Cookbook. Makes one 9-inch layer cake or about six dozen 1 1/2-inch cake pops.
3 3/4 cups all-purpose flour
2 cups unsweetened cocoa powder, plus more for dusting cake pans
2 teaspoons baking powder
1 teaspoon baking soda
1/2 teaspoon salt
3 1/2 cups granulated sugar
4 large eggs
1 cup hot water
1 cup buttermilk or milk
1 cup canola oil
1 tablespoon vanilla extract
Preheat oven to 350° F. Grease two 9-inch cake pans and lightly dust them with cocoa powder. Set aside.
Combine flour, cocoa, baking powder, baking soda, and salt in a bowl and stir to mix. Set aside.
Combine the sugar, eggs, water, buttermilk, oil, and vanilla in the bowl of a standing electric mixer. Beat until well blended.
Add the flour mixture to the egg mixture about one-quarter at a time, blending well and scraping down the sides of the bowl after each addition.
Divide batter evenly between the prepared pans and bake for 50 to 55 minutes, until the cakes are firm to the touch and a toothpick inserted in the center of each cake comes out clean.
Remove from the oven and cool cakes for 15 minutes in the pans. Remove from the pans and continue to cool to room temperature. Frost and serve or crumble your cakes and mix with frosting to form into cake pops.
Chocolate Sour Cream Frosting
From The Joy of Cooking (1997 edition). Makes enough frosting for one 9-inch layer cake or about six dozen 1 1/2-inch cake pops.
10 ounces chocolate chips
1 cup sour cream
Melt chocolate chips in the top of a double boiler. Remove from heat and stir in sour cream until combined. Use immediately; if the frosting becomes too stiff or loses its gloss, set the pan in a larger pan of hot water for a few seconds and stir to soften.
Some of the links in this post are affiliate links. If you click through and make a purchase, I earn a small commission for my referral at no additional cost to you. Thank you for supporting Flour Arrangements.
You Might Also Like
Pin Rose Cake Pops For Later




Happy Birthday Tessa! I cannot believe she is five already. Your kids are so lucky.
The photos are outrageous. I am so sorry I missed them. Happy Birthday, Tessa!
These are adorable!
These cake pop roses look adorable and super cute…The spirals are very pretty and very girly!
Shobha
These are so cute! I love this idea. Your daughter is lucky to have a creative and talented mom!
OMG….so cute!!! And VERY creative!!! I love the the cake AND the flower pots! And I love the expression Tess’s face! That is one happy, lucky little girl!
Not only are your cake pops some of the most gorgeous I have ever seen, but what a complete genius idea to use the cone for the pot. It’s totally perfect!
Such a clever idea! I’ll definitely be using these 🙂
These are so pretty, thanks for sharing how to do them. May I ask, what kind of sprinkles did you use… the mini non pariels or a dust/glitter, or something else? Thanks!
Thanks, Maria! I used coarse red sugar crystals.
Hey just wanted to let u know that they make a cake pan that is for cake pops as i have one u can find it at walgreens or Hamricks.
I just seen these on Pinterest and they are just adorable !! I will have to try these !
Hello. These look lovely. Thanks for posting. I just wondered how you got the cake pops to stay in the cake vase? I was thinking of trying the cake vase to stick cake pops in, however, I was just wondering if the cake pops were top-heavy and created issues with the cake vase. Please help! Thanks!
The cake pops were top-heavy in the light ice cream cones, for sure, but in the cake vase, they stuck quite well. I’d totally recommend making a vase cake! The “lip” on the top of the vase is solid fondant. I poured edible silver balls inside after sticking in the cake pops. Good luck! I’d love to hear how it turns out for you!
Thanks! I’m gonna try it! Pray for me! LOL. 🙂
It’s going to be awesome, Clare! I can feel it!
Awww they r so cute…I have a quick
Question how did u get that bright
red color,,? Which brand & what kind
of color is that. Thanks
Thank you so much! I used red Wilton Candy Melts.